Basin taps are an essential detail that makes your bathroom beautiful. The bright look of new faucets gives the whole place a fresh appearance and these fixtures help us to maintain good hygiene. However, once the taps get dull and scratched, this gives your bathroom a worn-out look. Luckily, we can teach you how to replace the old basin taps and restore the glorious appearance of the bathroom area.
Turn Off Your Water
Before taking on any plumbing work, you need to turn off both cold and hot water from the main water supply. Next, run the all hot and cold faucets in your house for a while to drain any water left in the pipes and ensure you completely switched off the mains. Make sure to leave all your taps open.
Read also: How to Find a Reliable Plumber in London?
Remove the Old Tap
Get under the basin and unscrew the nut that locks the sink to the old tap. Doing it can be awkward and a bit complicated, but once the part is loose, it should come off quite easily. Once you unscrew the nut, lift your old faucet off the basin. To do so, you will need to disconnect the old tap from the domestic pipework.
Check also: 4 Plumbing Problems You Can Fix by Yourself

Take a picture of how all pipes are connected before dismantling them so it is easier to put everything together when you’re done.
Install the New Basin Tap
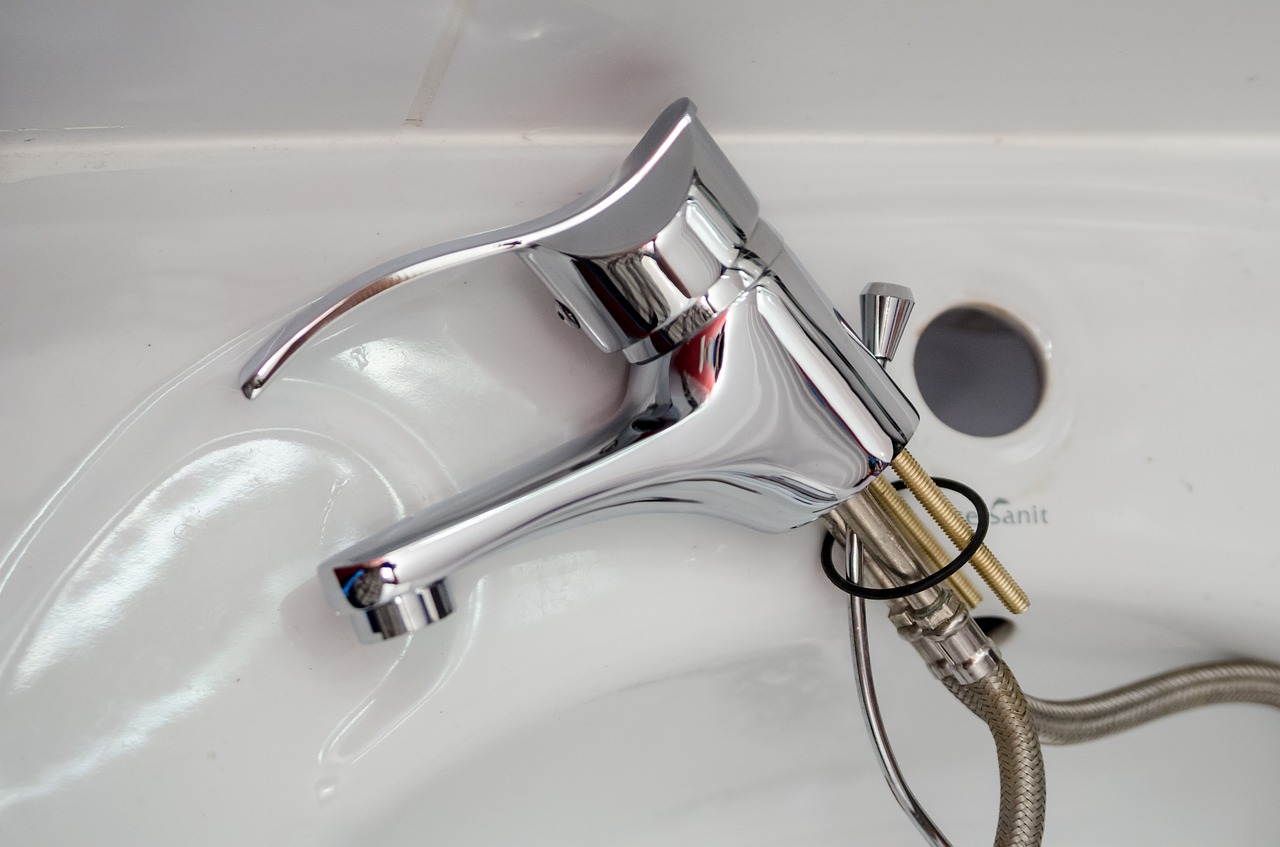
Attach the threaded post to the new tap and feed into the hole in the basin. Make sure the fixture is on top of your sink, and the thread is poking out below. You may need to put a washer to make sure the tap sits securely. Tightly screw the nut onto the threaded post, so the faucet is gripped onto the basin.
Read also: Useful Tips on Fixing a Leaky Shower
Connect the Plumbing
Fit the flexible connectors to the new tap. After that, connect them to the domestic pipes. You may need to place a compression fitting in between. A compression fitting is a part that attaches the water pipe to the flexible tap tail. Although you may have compression fitting connected on your old pipes, not all of these parts are the same size, so make sure to check if you need a new one. Adding a compression fitting keeps the pressure between the two pipes safely regulated. The new basin tap is now steady gripped onto your sink. Both hot and cold water pipes should feed directly from the wall into the new ones. Check all the nuts, washers, and joints to make sure there are no leaks or loose connections.
Check also: The Duties of a Handyman
Switch On the Water Supply
Now it is time to turn on the water supply. If there is some air backed up into the pipes or tap, it will burst out, followed by the water. If you forgot to open the new before fitting it, the air rushing through could potentially damage it. That is why we recommend setting all taps to ‘open’ before you start working.
Read also: How to Avoid These 5 Common Mistakes When Planning a Renovation at Home?
Your new faucet should now have a beautiful and steady stream of water. Congratulations! You have just finished this DIY tap fitting by yourself!


